Thursday, 6 December 2018


Earthship 2018 Update


Just when you thought nothing happened this year?

Temperature Tracking (2017/2018)

So last year we started tracking various temperatures inside and outside the earthship, and here are the results so far:

Some Notes:
  • See previous post for location of "Room T", "Tire Wall T", "Greenhouse T" and "Outside T"
  • "Weather T" is from Environment Canada
  • "Sunny Flag" is set to "Full Sun in Greenhouse" when I observed direct sunlight inside the greenhouse; for all other conditions this flag is not set (even if it was sunny but not directly inside the greenhouse)
Some Observations:
  • Earthship did not freeze over winter!!! YAY!!! Even without supplemental heating. I think this is quite an achievement given our great Canadian winters.
  • The tire wall temperature reached a minimum of 3 degC over the 2017/2018 winter season, even with outside temperatures reaching -30 degC
  • The tire wall temperature reached a maximum of 18 degC over the 2018 summer season, even with outside temperatures reaching 30 degC
  • The greenhouse temperature tracks either the outside temperature or the tire wall temperature, whichever is higher
  • Room temperature, i.e. the air temperature inside the "U", is about the average between the greenhouse and tire wall temperatures
  • Not sure yet how temperature performance is affected by opening the greenhouse windows, though there was an appreciable affect on humidity (not shown on graph). More data is required.

Roof Slab Pour (Sep 2018)

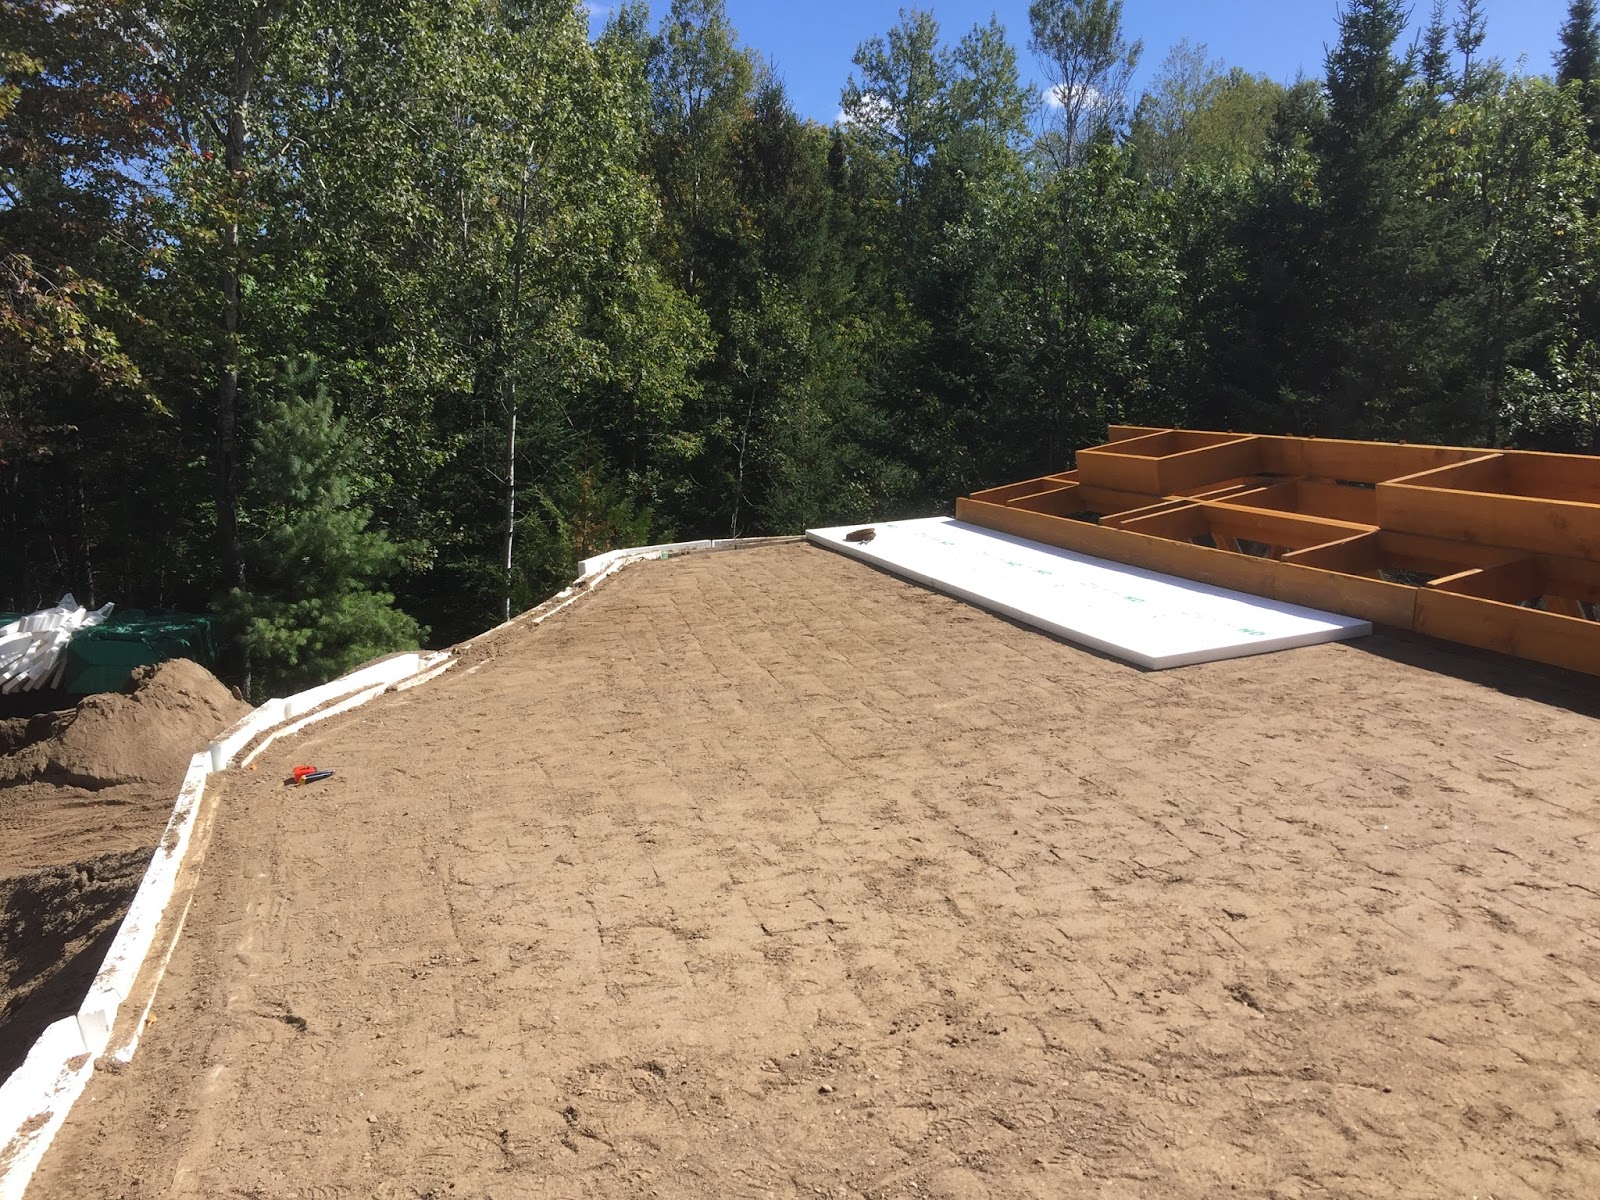
So the final layer of the roof is a 3.5" concrete slab that protects the EPDM waterproofing layer and acts as a surface for collecting rainwater.


We built the form out of leftover hemlock from the greenhouse framing. There is 1/2" rebar along the perimeter of the form, and 4" remesh throughout. The small white blocks in the picture are pieces of leftover foam insulation used as spacers to keep the remesh embedded in the concrete during the pour.


The crew is ready to pour. BIG THANKS to Dave B, Adam and Dave W. for helping us.


We decided to hire a concrete truck and pumper to make our lives easier. Here they are priming the lines.

A typical concrete pad process: pour the concrete, spread it with a rake and take out any air bubbles. I'm plunging a 2x4 into the concrete to "vibrate" the air bubbles out.
 

Then we "screeded" the concrete level with the forms using a long 2x4.


We weren't going for a smooth finish, so in most places we just left the screeding as-is. In some areas the screeding was particularly rough so there's Dave B. in the background doing some "spot" smoothing with a trowel.


And there you have it: one large concrete pad on the roof!


We left the hemlock forms in place to serve as expansion joints.


And we left our hand prints just for fun!

Interior Footings Pour (Sep 2018)

Since we were getting the concrete truck and pumper anyway, we had the capacity to pour the interior footings as well. We had to start by burying some more chases and drain pipes.


This is a blackwater drain from the utility room. The idea is to have an automated poo-bucket washing station there; something like a hacked dishwashing machine.


This is the overflow from the greywater planter to the main drain.


We added a chase to bring treated water from the greywater planter to the utility room for washing poo buckets. We are now ready to build the forms for the footings.


These footings are for interior (potentially load-bearing) walls. We are now ready to pour.


There was some concrete left over from the pour so we used some of it to "pack out" the tire walls, which means filling in the curved spaces between tires to make a flat wall. I don't have pictures of that unfortunately, but BIG THANKS to Mike C. for helping with that process.

Vent-tubes Upgrade (Oct 2018)

So last year when I was living in the earthship, I noticed that during heavy rains water would enter through the vent tubes. I realised that the runoff was saturating the ground where the vent tubes are buried. To solve this problem, we decided to waterproof the underground vent-tube connections. This was fixing an unanticipated problem so it wasn't really advancing our build, but it had to be done.


We started by digging out the snorkel, which consisted of two 50 gallon drums welded together. The entrance to the vent tube is now exposed, and this was where water entered during heavy rains.


We then connected a galvanized steel, 90 degree coupler with a neoprene gasket for a water tight seal.


For added waterproofing we wrapped the connection with Blueskin (TM), which is a sticky asphalt membrane that you can apply like tape.
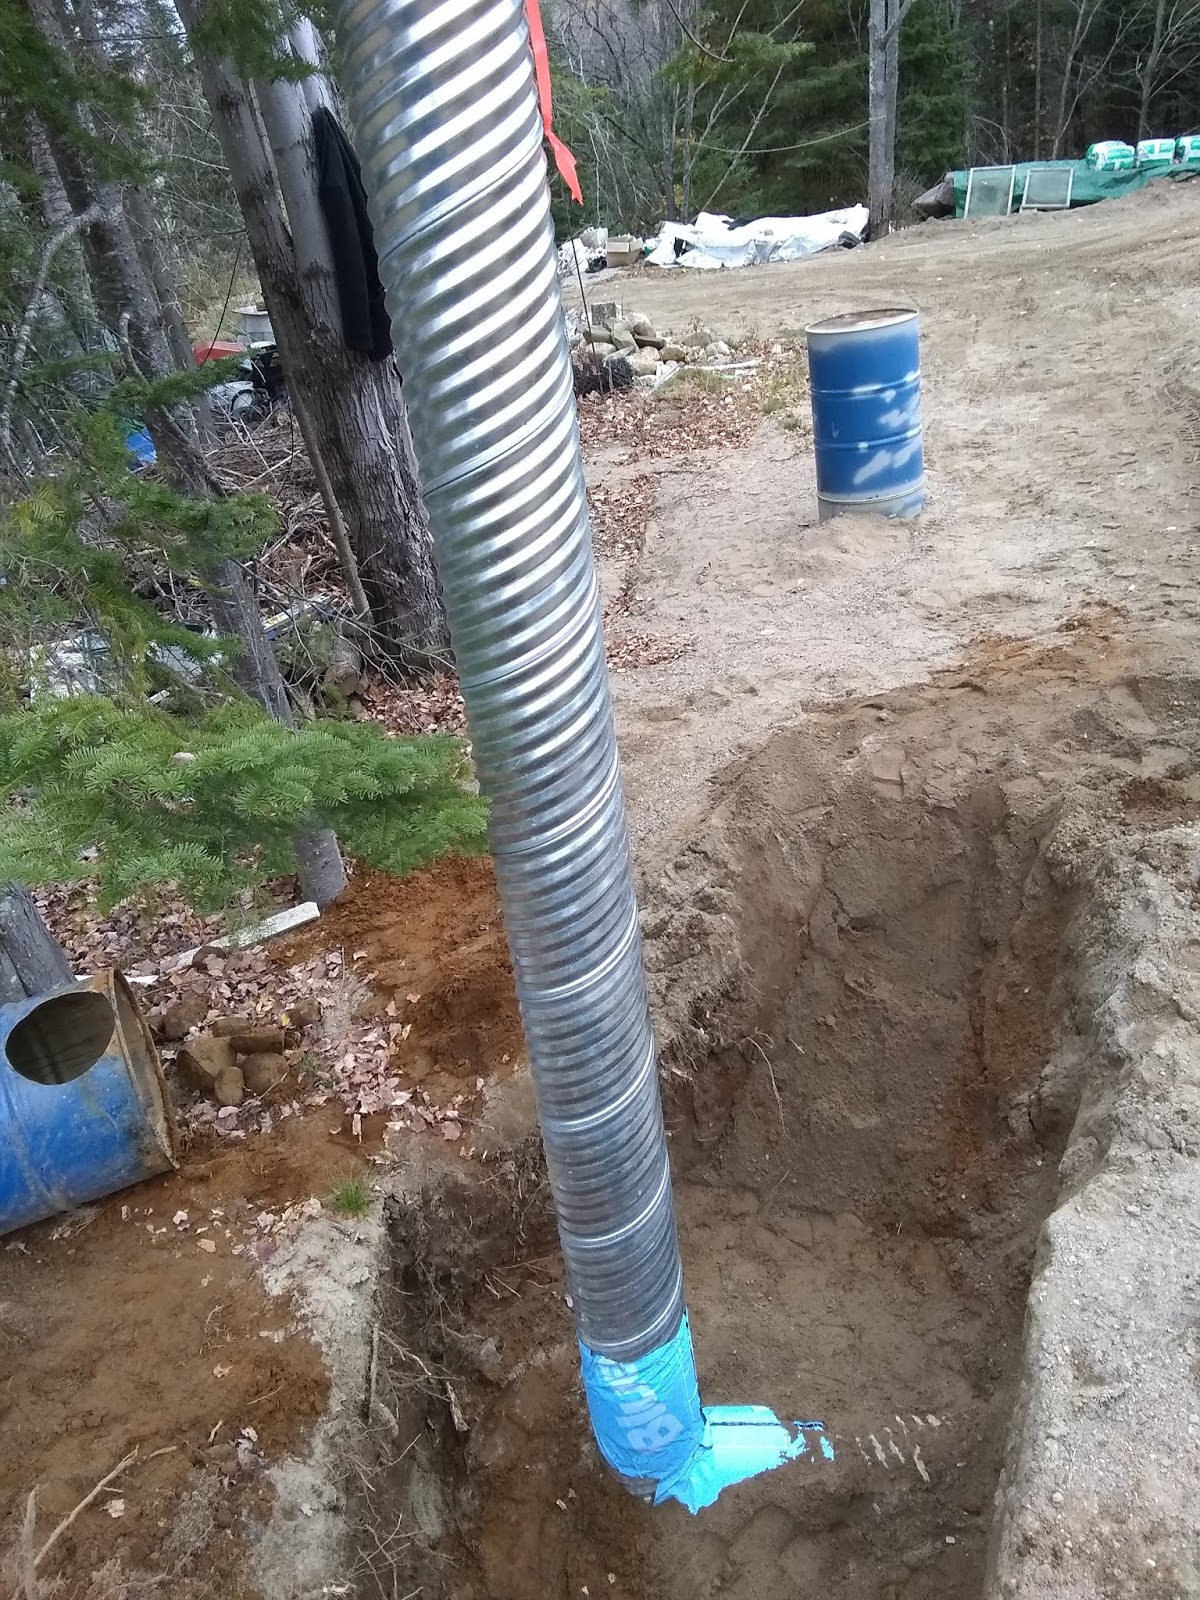

Then we connected a 10' length of galvanized steel culvert in the same manner, again for water tightness.


A bit of back-filling and voila, a new, waterproof snorkel for the fresh air vent tubes. We will probably cut the tubes down to size after the final burial. We plan on using the original drum snorkels as rain caps for the new tubes, but for now a couple of 5 gallon pales will do.


Retaining Walls and Cement Plaster (Oct 2018)


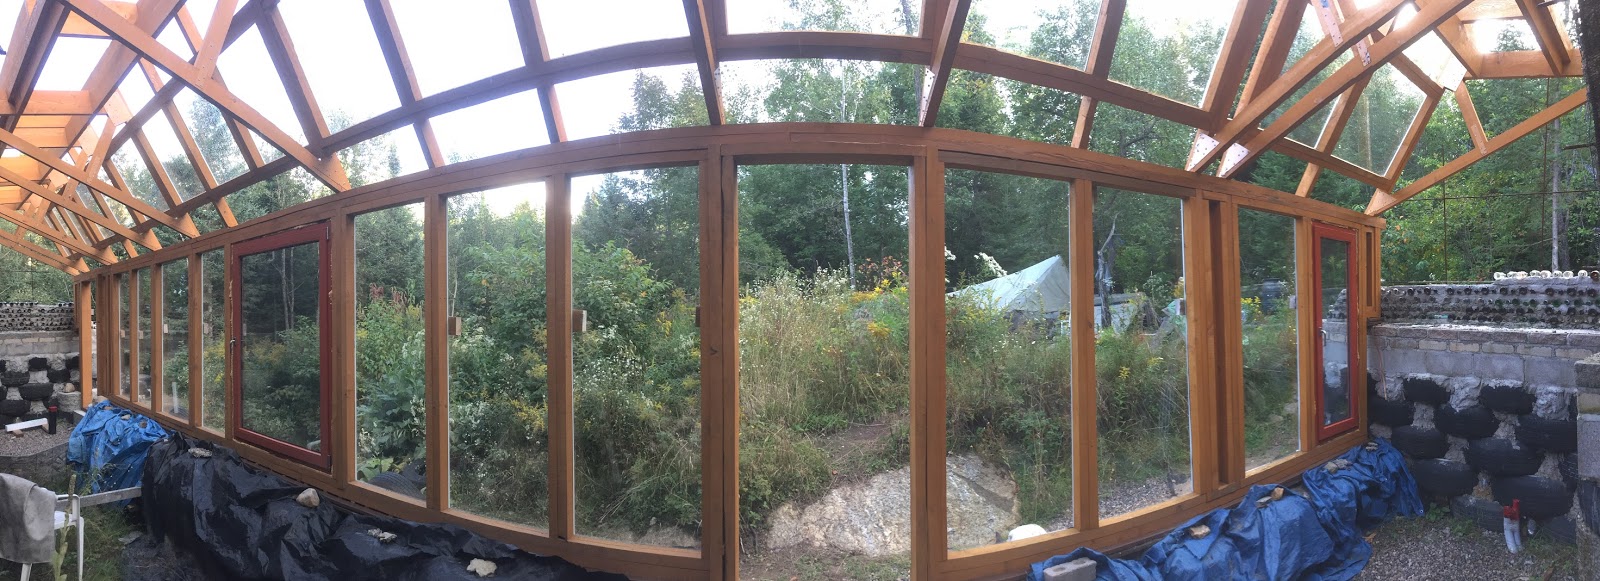
We built up the "wing walls" with a bottle wall (seen in the foreground) in order to retain the final burial. You can also see that the greenhouse endwalls have been cement plastered. The remaining exposed 6 mil plastic will be covered by the final burial.


Cement plastering consists of covering the exposed 6 mil plastic with expanded metal lath and then applying layers of cement plaster. The first layer of cement plaster is "scratched" to create good mechanical bonding with subsequent layers.


Here the front stem wall has been covered with expanded metal lath and the first layer of cement plaster, called the "scratch" coat. The 6 mil plastic is now protected from UV damage.The final, smooth layer of cement plaster will be applied next year.


Starting the Final Burial (Oct 2018)


First, we moved the solar array to the roof to make room for dirt!


We also added manhole extensions to the cisterns so that we can still access the cisterns (for clean-out, etc.) after the final burial.


We had the dirt dumped right next to the earthship.


It wasn't as straight forward as expected. There isn't much room around the earthship to maneuvre the tractor, so we had to build ramps.


Once we piled the dirt to the right height (just below the concrete pad) and the right angle (between 30 and 45 degrees) we pulled the EPDM out to cover the berm.


Next year we will cover the EPDM with more dirt, probably a foot or two of it, which will protect the EPDM from UV damage. We can then plant herbs and berry bushes (with shallow roots) on that final layer of dirt.

See You Next Year! (Nov 2018)


Unfortunately we did not get the chance to bury the back or the other side of the earthship before snowfall, so that's where we'll begin first thing next year. Have a great winter and See you then!

Monday, 25 December 2017

Earthship Update Spring to Winter 2017

October 30, 2017
The envelope is completely enclosed, i.e. air and water tight. The interior becomes inhabitable for the first time and can now serve the function of "shelter".

The following recounts the stages leading up to habitation, in this the fourth season of working on this project...

Test of Strength (May 7, 2017)
We arrived in spring 2017 to discover a tree had fallen on our house! It was a fully grow balsam fir. To my extreme relief, the only damage was to the tree!


Rear Retaining Wall (May 2017)
We started to build the retaining wall around the back of the house.


Once the wall got to a certain height, it became difficult to reach the top to continue building, so we had to switch to berming.

Break June 2017
I went to help our neighbour Rocky with an art installation project in Calgary, AB. While I was out there YP joined me for 10 days to travel the Rocky Mountains!

Snorkel Extension (July 2017)
We realised the snorkels for the air intakes were too low to the ground and would have to be raised to stay above the berm (a bit of wasted work).
So we welded the intake holes shut...


Cut the top out and welded a whole barrel on top...


A bit of primer to hold off the rust and presto!


Note that we didn't cut new intake holes yet in case we need to raise them again during the final berming.

Operable Windows Install (July 24, 2017)
The two operable windows were installed by the supplier Paudash Windows (for a small fee of course).


Partial Berm (July/August 2017)
First fill inside the building envelope...


Then insulate with a double layer of 4' x 8' x 2.5" @ R10 rigid foam...


Then cover with two layers of 6-mil poly and a whole lotta dirt!


Finish Rear Retaining Wall (August 2017)
Once bermed, we could finish building the retaining wall to it's final height.


Now we can insulate the retaining wall. We embedded bailing wire in the wall to attach the styrofoam to.


Cistern Overflow Connection (August 20, 2017)
Next we added an overflow from the cisterns into the house. We heard from the earthship community that the greywater planter in the house accumulates salts over time and would benefit from a fresh water flush once in a while. We used PEX for the line.


Roof Infill (August/September 2017)
To infill the roof we had to construct ramps for the tractor to go up and dump directly inside the retaining wall. Thank god for the tractor!


As you can imagine, moving dirt is laborious, so big thanks to our friend Dave for helping out. He and his partner Kat are also building an earthship. Their activities are documented on their blog Sailing The Earth.


Glass Install (September 7, 2017)
Time to take a break from all that dirt! The upper glass of the greenhouse is the same thermal panes as the lower glass installed last year (from the same supplier Paudash Windows). And how lucky are we to get volunteer help from our two neighbourhood pro glazers again! Thank you Rocky and Sean. And thank you Mike for lending an extra set of strong hands that also happen to work a guitar pretty good. Mike's band freedubstar recorded their debut album just down the street (walking distance) from us.


Dome Roof Insulation (September 2017)
Same rigid styrofoam sheets (4' x 8' x 2.5" @ R10) are used to insulate the roof.
We used four layers.


We used bailing wire "clips" to fasten the styrofoam sheets to each other.


A big thank you to Brandon and Dennis for helping out!


YP working on the last layer:


Time to wrap up... two layers of 6mil poly should do the trick.


Greenhouse End Walls (September 2017)
More bottle wall masonry work...


Greenhouse Roof First Layer (September 2017)
3/4" plywood with two coats of Sansin Enviro Stain...


Greenhouse Front Face (September 2017)
Here's YP starting work on covering up the open spaces on the front face of the greenhouse with 3/4" plywood panels. After dry fitting the panels we took them down and double coated them with Sansin before permanently installing them.


Unfortunately we don't have pictures of Blair, Tammy and Stu dry fitting the upper panels. Thank you again so much for your help!

Dome Roof Waterproofing Membrane (September 23, 2017)
We used a 30' x 70' x 45-mil-thick piece of EPDM rubber (pond liner) as the waterproofing layer on the dome roof section. The EPDM came in a 10' x 100' roll that weighed about a thousand pounds! Needless to say we couldn't have done it without help.
Here we are contemplating strategy...


We agreed that pulling the EPDM end-over-end would be the easiest way to get it in position.


Then, with all hands on deck we pulled the membrane onto the roof.


Time to step back and admire our collective accomplishment!


Thank you Blair, Tammy, Rocky, Kat, Dave, Ruth, Stu and Ro! We most definitely could not have done this without you. And especially Tammy, thank you so much for organising this!

Greenhouse Roof Insulation (September 2017)
Two layers of 6-mil poly to cover the plywood then four layers of rigid foam insulation on top. Ro took time out of his busy schedule running The Arlington Hotel and Pub to help out... thank you Ro!


Stemwall Insulation (September 2017)
The "stemwall" is the short tire wall (two tires tall) at the front of the greenhouse. Prior to insulating, we "pack out" the space between tires to get an approximate flat surface. We used mortar with just enough portland cement to hold it together, since the pack-out is not structural.


Then two layers of insulation can be attached to the tires with screws and fender washers.


Any remaining space between the insulation and the tire wall can be filled with dirt.


The top layer of insulation was a single layer (due to geometric constraints) and was cut with a 2-degree slope to shed water. We build an electric wire cutter for the purpose.


As usual, the insulation is covered with two layers of 6-mil poly and bermed.


Cistern Burial (October 2017)
With sub-zero temperatures fast approaching, it was time to insulate and bury the cisterns. We added manhole extensions to maintain access to the inside of the cisterns after burial. We added inlet pipes that will eventually connect to the dome roof for rainwater collection.


Thank you Nick for your help!


Greenhouse Roof Completion (October 2017) 
Two layers of 6-mil poly to wrap the foam insulation, and a final layer of 3/4" double coated plywood attached with 12" (!) GRK structural screws. Thank you Amma for your help! (Amma means mom in Tamil and this lovely lady is Dash's):


Greenhouse Front Face Completion (October 2017)
All remaining greenhouse openings covered with 3/4" double coated plywood.


The greenhouse is now completely enclosed (i.e. air and water tight) with a little (lot of?) help from expanding foam from a can (what did we ever do without it?).


Thermometers and Humidity Meters (October 2017)
We installed thermometers and humidity meters in various places for manual tracking.

A thermometer and a humidity meter outside in what looks like a birdhouse (to keep the elements from skewing the readings):


A thermometer in the greenhouse strategically placed to prevent sunshine from skewing the reading. You can see the outdoor station through the window


A compost thermometer (essentially a 30 cm long meat thermometer) embedded in the tire wall, and a regular thermometer and humidity meter at the back of the room where I plan on living this winter (for as long as I can handle the cold!).


Winter Shelter (November 2017)
We set up the outdoor kitchen and built a bed frame out of milk crates and skids.


We enclosed the area with insulating curtains:


Covered the tires with bedsheets, set up some LED lighting, and voila!


Move-In November 6, 2017 
I officially moved out of our trailer and into the earthship on November 6, 2017. It was 3C, 53% RH and overcast outside; the greenhouse was 12.5C; the room was 14C and 89% RH; the tire wall temperature was 11.7C. Let's see how long I can stay here before it gets too cold! 

Greywater Planter (November 2017)
I can get used to this short commute! We started by digging out the proposed area of the planter, about 30' x 6'. There is a "shallow" end (far end of picture), which is about 30" deep and slopes down to the "deep" end which is about 32" deep.

 
Canadian shield extends from inside the greenhouse to the exterior of the building, where it is exposed to the elements. To mitigate the effect of this "heat sink", we insulated it using the plastic wrapping that the rigid foam insulation came in.


Then is was time for the pond liner, which was a 40' x 15' x 45-mil-thick piece of leftover EPDM rubber membrane from the dome roof waterproofing.


Now we can start filling with gravel. The plans call for "washed" gravel, but we just used gravel that had been sitting uncovered outside since last season. Also, we can set the required pipework (2 inlets, 1 outlet, 1 overflow, 1 recirc) using ABS tubing that we perforated with 5/8" holes below the waterline.


The plans also call for a peatmoss filter, which are the green and white plastic bags in the planter. We perforated these by stabbing them with a cross-shaped plastic tent peg.


We added some stone baffles to help direct the flow of water. The idea being that the longer the "run" the more surface area will be available for cleaning the water.


Some more gravel and the planter is now level with the rest of the house. What a relief it is to be able to walk through the house without climbing in and out of that hole in the middle!


Stay tuned to see how the earthship performs this winter...